
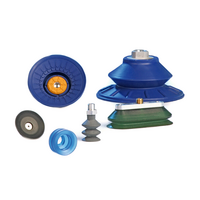
Item # VACUUM CUP MAINTENANCE
PROPER MAINTENANCE OF AN AUTOMATION VACUUM CUP
- UM : EA
Vacuum Cup Maintenance
Vacuum Cup Maintenance is an important part of extending the safe functional lifespan of the vacuum cups used for material handling and positioning on automation machinery. Vacuum cups currently in use on machines and those in storage both benefit from regular attention. When included in an overall preventive maintenance schedule, regular vacuum cup cleaning can prevent the build-up of dirt and debris that adds to the physical wear of the cups, helping maintain the performance of vacuum cup equipped machines. Regular cleaning can help vacuum cups achieve their designed lifespan of several hundred thousand cycles, protecting the material and preserving function throughout the life of the cup.
Cleaning Solution Preparation
General cleaning of vacuum cups can be done with common dish soap and water as needed. This will remove dirt, grease, and debris from most vacuum cups.
Cups installed on metal fittings can be cleaned using a mixture of 10 parts 70% ethanol to 1 part glycerin. This solution is a mild organic solvent ideal for removing any organic contaminants from the surface of both rubber and thermal plastic vacuum cups. Care should be taken in preparing this solution, as too much glycerin can weaken rubber vacuum cups by removing necessary oils and can damage certain types of thermal plastic cups.
After longer storage times (6-8 months) vacuum cups may need to be cleaned with a solution of 2 tablespoons baking soda to one pint of water (16:1 ratio of water to baking soda). This helps to remove particles that are difficult to get off. Complete this cleaning process by thoroughly rinsing all residue from the vacuum cups with water.
Avoid using substances that may leave a greasy residue (i.e. WD-40) or cleaners that are vinegar based. Do not use any cleaners that contain the following ingredients: Pure Glycerin, Trichloroethylene, Carbon Tetrachloride, or Hydrocarbons. Also, do not use abrasive cleaners or scraping tools such as sandpaper, wire brushes, or picks as they can damage the cup and prevent it from working correctly and safely.
Cleaning Procedure
- Remove installed cups- Detach from the equipment if possible. If that is not an option, take care not to get any nearby electronics or other moisture sensitive components wet when cleaning.
- Prepare cleaning solution- If in doubt, start with dish soap and water.
- Clean- Coat the cups with the solution of your choice by momentarily submerging them into the solution or using a spray bottle to apply. The objective is to get the cups coated, but not to expose the cups to the solution for a long period of time. Once coated, use a rag to wipe them down gently and thoroughly. If needed, you can also use a soft brush and carefully scrub the surface until the cups are clean.
- Dry- Once the cleaning process is completed, wipe the cups with a dry cloth and let the cups dry at room temperature.
- Re-install- Once cups have completely dried, re-attach to equipment.
Storage Tips
- Limit Light Exposure- Store vacuum cups in a dark area. Ultraviolet light can cause cups to harden and develop cracks. Store where vacuum cups can be spread out and are stress free from all directions. This will help maintain the vacuum cup’s original shape and allow it to function correctly once it is in use.
- Maintain Temperature- Optimum storage temperature for vacuum cups is between 15 °C and 25 °C [59 °F to 77 °F].
- Proper Humidity- Vacuum cup storage should be under 65% of relative humidity. Any areas with condensation should be avoided. It is not recommended to store or use vacuum cups in very dry or very moist environments.
- Avoid Ozone- Do not store vacuum cups next to any equipment that generates ozone (i.e. high voltage electrical equipment). This can cause deterioration of the vacuum cup material in much the same way as ultraviolet light. Ozone and ultraviolet light damage to rubber and thermal plastic vacuum cups is often referred to as ‘dry rot’.
- Rotate Stock Rubber and other materials naturally age and deteriorate over time. Avoid long storage times. If possible, vacuum cups should be used within 24 months of purchase. Organize inventory so that older vacuum cups are used first.
Automation Vacuum Cups are your equipment’s connection to your product. Keeping them in peak condition through proper maintenance and storage can maximize their lifespan, ensure safety, and optimize performance for increased productivity.
NOT FINDING WHAT YOU NEED?
SEND US AN E-MAIL:
SALES@THEPNEUMATICSTORE.COM
Specifications
| ARTICLES REGUARDING | AUTOMATION COMPONENTS |
